A single misbehaving scraper can fire 40,000 requests an hour at a 404 it will never stop hitting, and your access log will dutifully record every one. Most of us notice somewhere around the third pager alert, usually at 3 a.m., usually after the bot has already walked your entire /wp-login.php guessing routine. The annoying part isn’t the traffic. It’s that the server knew every one of those requests was garbage the instant it returned the error code, and did absolutely nothing with that knowledge.
That gap is exactly what the nginx-error-abuse-module closes. It’s a dynamic NGINX module, written in C, that watches the status codes your server hands back and temporarily blocks any client generating too many errors. A hundred errors in five minutes? Gone for an hour. Think fail2ban, except it lives inside the worker process instead of tailing a log file from the outside, and it makes its decision before the next request ever reaches your application.
Source is on GitHub: github.com/myguard-labs/nginx-error-abuse-module. No Lua, no njs, no sidecar daemon. Let’s get into what it does, why you’d want it, and the three or four places it’ll bite you if you’re careless.
What the error-abuse module actually does
Here’s the whole idea in one sentence: you tell it which status codes count as abuse, how many a client gets in a time window, and how long to lock them out when they cross the line.
A client trips the threshold, and from that point every request gets a 429 Too Many Requests (or whatever status you pick) until the block expires. The client’s own blocked requests don’t count against them, so a banned bot hammering your door doesn’t extend its own sentence. That detail matters more than it sounds. Get it wrong and an aggressive scraper renews its ban forever, which is either a feature or a footgun depending on how much you enjoy clients that can never recover.
The codes you watch are yours to choose. A list, a range, or both: 403,404,429,500-599 is a perfectly normal config. Watching the 5xx range is the interesting one, because a flood of 500s usually means somebody found the one URL that makes your backend cry, and you’d rather not let them keep poking it while you figure out why.
Counting happens in an NGINX shared-memory zone, so every worker sees the same tally. The bot doesn’t get its allowance per worker. It gets one budget, total, across the whole server. And because the module sits in the response phase, the cost for normal traffic is close to nothing. A 200 response barely touches it. It only does real work when something actually errored.
Why not just fail2ban or limit_req?
Fair question. You’ve probably got both already. Here’s the honest comparison, scars included.
Fail2ban works by reading your logs. Something has to write the log line, fail2ban has to read it, parse it with a regex, decide, then shell out to iptables or nftables to install a rule. That whole pipeline has latency measured in seconds, and it depends on a second process staying alive, your log format not drifting, and the regex still matching after the next NGINX upgrade quietly renames a field. I’ve watched fail2ban silently stop banning anything for three weeks because a log format tweak broke one capture group. Nobody noticed until the bill from the bandwidth showed up.
The error-abuse module makes the decision in-process, in microseconds, with no log round-trip and no firewall syscall. The state lives in shared memory the worker already has mapped. There’s no second daemon to babysit.
And limit_req? Great tool, wrong job. It throttles request rate, full stop. It doesn’t know or care whether those requests succeeded. A client politely fetching your sitemap at 10 req/s looks identical, to limit_req, to a client brute-forcing logins at 10 req/s. The error-abuse module only cares about the ones that failed. That’s the distinction: limit_req rations everyone, error-abuse punishes the clients that are obviously up to no good and leaves your legitimate fast traffic alone.
Use all three. They don’t overlap. limit_req caps the firehose, the error-abuse module catches the error-storming scanners, and fail2ban can still mop up at the network layer for the stuff that never reaches NGINX at all. If you’re already running a WAF, this pairs nicely with it too. See our guide on installing ModSecurity and the OWASP CRS on NGINX for the layer that inspects request content rather than counting failures.
The five-minute config
Load the module, declare a Redis endpoint if you want one (optional, skip it for now), declare a zone, then switch it on in a location. Here’s a working setup with every knob labelled.
load_module modules/ngx_http_error_abuse_module.so;

http {
    error_abuse_zone zone=client_errors:10m
                     key=$binary_remote_addr
                     statuses=403,404,500-599
                     interval=300s
                     threshold=100
                     block=60m
                     inactive=1h;

    log_format main '$remote_addr "$request" $status '
                    'error_abuse=$error_abuse_status '
                    'count=$error_abuse_count';

    server {
        location / {
            error_abuse zone=client_errors status=429;
        }
    }
}
Read it out loud and it explains itself. A client identified by IP ($binary_remote_addr) gets threshold=100 matching errors inside a rolling interval=300s (five minutes) before it earns a block=60m timeout. The 10m after the zone name is the shared-memory size, not a duration, which trips up everyone exactly once. The inactive=1h tells the module to forget about a key after an hour of silence so the zone doesn’t fill up with one-time visitors.
nginx -t before you reload. Always. The one time you skip it is the time you fat-fingered the zone size and took the vhost down on a Friday afternoon.
The sliding window, and why it matters
Most naive rate limiters use a fixed window. Reset the counter every ten seconds on the clock, count until it resets. The problem is the boundary. A client can fire five requests in the last half-second of one window and five more in the first half-second of the next, and slip ten requests through a “five per ten seconds” rule without ever tripping it. Attackers know this. It has a name, the fixed-window boundary problem, and it’s exactly the kind of thing a determined scanner probes for.
The error-abuse module uses an exact sliding window instead. The interval moves with the client. Every request looks back across the real previous interval seconds, not at an arbitrary clock-aligned bucket. There’s no seam to exploit. It costs a little more bookkeeping per key, which is why threshold is capped at 1024: the per-key memory stays bounded no matter how clever you get with the numbers.
One thing to internalise. The window, the threshold, and the block are independent. interval is how far back it looks. threshold is how many errors fit in that look-back before the hammer drops. block is how long the hammer stays down, and it has nothing to do with the interval. You can watch a tight 10-second window but block for a full day. Tune them separately to taste.
Picking the key: IP, account, or something smarter
By default you key on the client IP, and for most setups that’s the right answer. But the key is just an NGINX variable, which means it can be anything the request gives you. An authenticated API? Key on the account ID and a single abusive user can’t dodge the ban by bouncing across a /16 of cloud IPs. A tenant identifier, a session token, a hash of something. Your call.
Now the part that pages people. If you run behind a CDN or a load balancer, every request arrives wearing the proxy’s IP, not the client’s. Key on $binary_remote_addr naively in that setup and you’ll either ban your own load balancer (taking out everyone at once) or never ban anyone, because all the traffic shares one address. Neither is the outcome you wanted.
The fix is the standard ngx_http_realip_module, configured to trust only your actual proxies:
set_real_ip_from 10.0.0.0/8;
set_real_ip_from 2001:db8::/32;
real_ip_header X-Forwarded-For;
real_ip_recursive on;

error_abuse_zone zone=client:10m
                 key=$binary_remote_addr
                 statuses=404 interval=30s threshold=10 block=15m;
With realip set up correctly, $binary_remote_addr resolves to the genuine client again and everything works. What you must never do is reach for the raw X-Forwarded-For header as your key without realip in front of it. That header is client-supplied. An attacker just sticks a fresh fake IP in it on every request and your ban list fills with ghosts while the real bot strolls through. Trust the header only from sources you control.
For allowlists, there’s an elegant trick: the module ignores empty keys entirely. So a map that returns an empty string for the addresses you trust skips them with zero overhead, no special directive needed.
map $remote_addr $error_abuse_key {
    127.0.0.1   "";
    10.0.0.0/8  "";
    default     $binary_remote_addr;
}

error_abuse_zone zone=external:10m
                 key=$error_abuse_key
                 statuses=403,404 interval=30s threshold=10 block=15m;
Localhost and your internal range now sail past untouched. Health checks from your monitoring stop accidentally banning themselves. Everyone else gets counted.
Surviving a restart: disk persistence
Out of the box, counters live in shared memory and survive a graceful reload (nginx -s reload) automatically. The module hands state across to the new workers. Good.
What a graceful reload does not cover is a full stop and start, or a host reboot, or the OOM killer waking up and shooting a worker in the head. Shared memory evaporates, and every ban resets to zero. The bot you locked out two minutes ago gets a clean slate the moment systemd restarts the service after your kernel upgrade.
Add persist= and the module snapshots state to disk:
error_abuse_zone zone=client_errors:10m
                 key=$binary_remote_addr
                 statuses=403,404,500-599
                 interval=300s threshold=100 block=60m
                 persist=/var/lib/nginx/error-abuse-client_errors.state
                 persist_interval=5s;
The state directory has to exist and be writable by the worker user before NGINX starts. The module won’t create it for you, and it won’t be subtle about complaining. Each persistent zone needs its own file. The snapshot writes atomically every persist_interval (5 seconds by default), so a crash loses at most a few seconds of counting. Graceful shutdown writes one final snapshot on the way out.
Every snapshot carries a CRC32 checksum. If the file is corrupt, half-written from a power cut, or scribbled on by a bad disk, the module spots the bad checksum, deletes the file, logs the error, and starts clean rather than loading garbage state. The format is versioned, binary, and deliberately local. It is not a sync mechanism between hosts, just one server’s memory of who it was annoyed at. For sharing bans across machines, you want the next section.
Redis: one ban list for your whole fleet
Run more than one NGINX box behind a balancer and you’ve got a coordination problem. A scanner trips the threshold on node A, gets banned there, and the load balancer cheerfully sends its next request to node B, which has never heard of it and starts counting from zero. The attacker effectively multiplies their allowance by your number of front-ends. Embarrassing.
Point the module at a shared Redis and the ban becomes fleet-wide:
http {
    error_abuse_redis host=127.0.0.1 port=6379
                      prefix=ea_ timeout=100ms;

    error_abuse_zone zone=client_errors:10m
                     key=$binary_remote_addr
                     statuses=403,404,500-599
                     interval=300s threshold=100 block=60m
                     redis=on;
}
Every host using the same prefix and the same zone settings now shares one counter. Ban on node A, banned everywhere, instantly. The I/O is asynchronous: block lookups pause that one request’s processing without blocking the worker, and matching responses queue an atomic sliding-window update. Each worker holds a single Redis connection, not one per request. It speaks plain RESP, so a Valkey server works exactly the same as Redis. The default key prefix is ea_, and every host in a zone has to agree on it.
Locking down the Redis link: TLS, AUTH, and a separate DB
That shared Redis is also a shared liability, which is the next section’s whole point, so the module gives you the three knobs you actually need to harden the link. You don’t have to settle for a plaintext connection to an open port and hope nobody’s listening.
error_abuse_redis host=tls://redis.internal port=6380
                  user=erroruser password=secret
                  db=3 prefix=ea_ timeout=100ms;
Three things changed there, each optional. The tls:// prefix on the host (or rediss://, same thing) wraps the connection in TLS, with the server certificate verified against the system CA store at /etc/ssl/certs and checked against the hostname. That needs libhiredis_ssl at build and run time, and note one current limitation: a self-signed server cert won’t pass, because there’s no cacert= override yet. The user= and password= pair does Redis 6+ ACL authentication (a bare password= on its own sends a legacy AUTH); leave both off and it connects unauthenticated, same as before. And db=3 issues a SELECT so the module’s keys live in their own logical database instead of squatting in DB 0 next to whatever else you cache there.
The critical design choice here is what happens when Redis falls over. Because Redis always falls over eventually, usually during the incident you can least afford it. The module is fail-open. Redis unreachable means the local shared-memory zone keeps right on enforcing its own counters. You lose the cross-host coordination, you don’t lose protection, and you definitely don’t take an outage on your web tier because a cache node hiccuped.
It goes one better with a circuit breaker. After five consecutive Redis failures the module stops trying for thirty seconds, then tests the water again. Without that, every single request would keep flogging a dead Redis, filling your error log with thousands of identical timeout lines and burning syscalls on a connection that isn’t coming back. The breaker means one terse log line instead of a denial-of-service against your own logging. Anyone who’s watched a log partition fill to 100% during an outage, then watched the outage get worse because the disk filled, knows precisely why this matters.
One honest caveat, and the README is upfront about it: when redis=on, your Redis server becomes a trust boundary. A compromised Redis could inject fake bans or fiddle the counters. So keep it on a trusted network, firewall it, turn on the tls:// transport and the user=/password= ACL from the section above, and don’t expose it to the same internet you’re trying to defend against. If you’re hardening the box it runs on, our Docker hardening guide covers locking down the surrounding container.
Operating it without breaking prod
Never deploy a blocking rule straight to live traffic. You will get the threshold wrong on the first try, lock out something legitimate, and learn about it from an angry customer instead of a graph. So the module ships a dry-run mode.
location / {
    error_abuse zone=client_errors dry_run=on log_level=warn;
}
In dry-run the module does all its counting and decision-making and logs exactly who it would have blocked, while letting every request through untouched. Run it for a day. Read the logs. Find out that your threshold of 5 would have banned the Googlebot crawling a section of stale 404s, raise it, and only then flip dry-run off. This is the difference between a tool that protects you and a tool that becomes the outage.
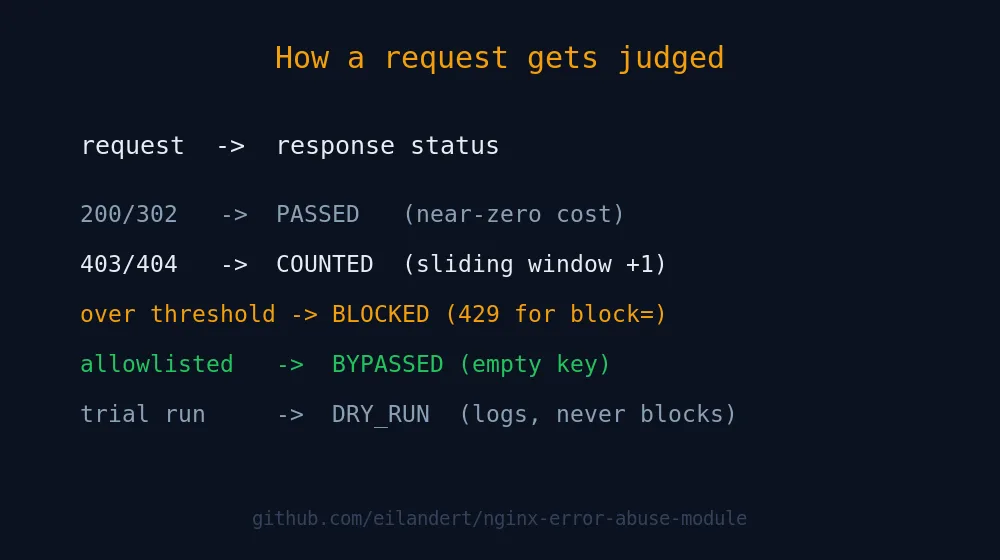
It exposes three log variables so you can actually see what it’s doing:
$error_abuse_statusresolves toBYPASSED,PASSED,COUNTED,BLOCKED, orDRY_RUN. One word that tells you the decision for this request.$error_abuse_countis how many matching errors are currently sitting in this client’s sliding window. Watch it climb.$error_abuse_blocked_untilis the Unix timestamp the block lifts, or0if the client is clean.
Put them in your log_format and your access log becomes a live feed of the module’s reasoning. Grep for BLOCKED to see who’s currently in the penalty box. Grep for DRY_RUN during a trial run to size your threshold before it’s load-bearing.
A couple of operational truths worth tattooing somewhere. Shared-memory exhaustion is fail-open: if the zone fills, the request is served and an error logged, never dropped. A zone’s key and threshold can’t change across a graceful reload, so when you need to change either, declare a new zone name instead of editing the old one in place. And subrequests don’t count, nor do responses the module itself generates, which is what stops a banned client from extending its own ban into eternity.
Building and installing it
It’s a standard dynamic module. You need libhiredis for the Redis support, even if you never turn Redis on, because it links at build time regardless.
apt-get install libhiredis-dev

./configure --with-compat \
    --add-dynamic-module=/path/to/nginx-error-abuse-module
make modules
The --with-compat flag is what lets the resulting .so load into a binary-compatible NGINX you didn’t compile yourself, which is almost certainly the one your distro shipped. Drop objs/ngx_http_error_abuse_module.so into your modules directory, add the load_module line, and you’re off.
If compiling modules by hand isn’t your idea of a good evening, that’s rather the point of this whole site. The module is part of our prebuilt NGINX packages and Docker images, so you can apt install it alongside the rest of the stack instead of wrestling a build tree. Browse the full set on the NGINX modules page. The repo also carries a GitHub Actions matrix that runs the test suite under Valgrind and CodeQL on every push, because a security module that leaks memory or carries its own vulnerabilities is just a different shape of the problem you were trying to solve.
Frequently asked questions
Does the error-abuse module replace fail2ban?
No, and you should not make it. They work at different layers. The module decides in-process, in microseconds, from HTTP status codes, and only protects traffic that reaches NGINX. fail2ban works at the firewall from log data and can block traffic before it touches your web tier, including non-HTTP services like SSH. Run both: the module is faster and more precise for HTTP error storms, fail2ban is broader and lives at the network edge.
Will it block legitimate users who hit a few 404s?
Only if you set the threshold too low. A real user clicking a couple of dead links will not trip a sensible threshold=10, interval=30s rule. The safe way to find your numbers is dry_run=on: run it for a day, read the logs, see who would have been blocked, then enforce. Allowlist your monitoring and internal ranges with an empty-key map so health checks never count against themselves.
What happens to my site if Redis goes down?
Nothing bad. The module is fail-open. If Redis is unreachable, each NGINX host falls back to its own local shared-memory counters and keeps enforcing bans, just without cross-host coordination. A circuit breaker suspends Redis attempts after five consecutive failures so a dead cache does not flood your logs or waste syscalls. Your site stays up and you temporarily lose only the fleet-wide sharing.
Do the bans survive an NGINX restart or reboot?
A graceful reload preserves state automatically. A full stop/start or reboot wipes shared memory unless you configure persist=, which snapshots state to a CRC32-checksummed file every few seconds and reloads it on startup. With redis=on, active bans live in Redis and survive a restart of any single node regardless of local persistence.
Can I use something other than IP address as the key?
Yes. The key is any NGINX variable, so you can key on an account ID, a session token, a tenant identifier, or anything else in the request. Behind a CDN or load balancer, configure ngx_http_realip_module to trust only your proxies and keep $binary_remote_addr as the key, so it resolves to the real client. Never key on a raw, untrusted X-Forwarded-For header: it is client-supplied and trivially spoofed.
Does it slow down normal traffic?
Barely measurably. The module is optimised for the common case: a successful, non-matching response does almost no work, because the expensive bookkeeping only runs when a request returns one of your watched error codes. The counters live in shared memory the worker already has mapped, with no log round-trip and no firewall syscall on the hot path.
How do I secure the Redis connection?
Three optional knobs on error_abuse_redis. Prefix the host with tls:// (or rediss://) to wrap the link in TLS, verified against the system CA store and hostname (needs libhiredis_ssl; self-signed certs are not supported yet). Add user= and password= for Redis 6+ ACL authentication, or just password= for a legacy AUTH. Use db=N to isolate the module keys in their own logical database. A Valkey server works identically since it speaks the same RESP protocol.
Related reading
- How to Install ModSecurity and OWASP CRS on NGINX — the content-inspecting WAF layer that pairs with error-counting.
- Valkey Explained: The Redis Fork That Actually Won — the cache engine behind cluster-wide bans.
- What Is the BREACH Attack? — another HTTPS-layer threat and how to shut it down.
- NGINX Modules, optimized & extended — the full set of prebuilt modules in our APT repo.
Anyway. Set dry_run=on first, watch the logs for a day, and only then let it start swinging. The bot that’s been hammering your 404s since last Tuesday isn’t going anywhere.